Hello All,
Making cards and tags is always a nice way to try out new
techniques. If the technique doesn't work, you don’t have a whole
12 x12 page that lands up in file 13. I am not a tag person but love
to make cards. If the background didn’t work out as planned I
normally put it in a box and next time around use them to punch out
embellishments for another project. Today I would like to share with
you a couple of cards I made trying out some new techniques.
Card 1: Distress Ink

To create the background, use some antique linen, vintage photo
and walnut stain distress ink. Ink through some stencils using walnut
stain distress ink. After this, splatter on some water and dry it
with a heat gun. Normally the splatter of the water would be before
using the stencils, but I forgot to do this so I just reversed the
process, it still came out pretty cool. A splatter stamp and some
Versafine brown ink was used to stamp the splatter image on the
background. Stamp the typewriter twice and fussy cut to create a 3d
embellishment, stamp the sentiment on the paper part of the top
typewriter and ink it with some antique linen distress ink. Complete
the typewriter using 3d tape. Punch out some flowers and inked them
with worn lipstick, tattered rose and Victorian velvet distress ink
as well as ink the edges with walnut stain distress ink. Use some
diamante as the centres of the flowers. The seam binding was colored
with the same brown and pink distress inks as used on the card. The
matt for the background was coloured heavily with some worn lipstick
distress ink, splattered with water, dried with a heat gun and then
inked with some walnut stain ink. The card front was lightly inked
with victorian rose and vintage photo as well as walnut stain
distress ink. Complete the card by putting everything together and
lastly tie the seam binding around the completed card.
Card 2: Distress Stain

Dab some picket fence distress ink on a craft sheet,
dab some stormy sky, evergreen bough and faded jeans distress ink
around the picket fence distress ink. Spritz with water and drag the
card background through the distress ink until you are happy with it.
Dry with a heat gun and while drying spritz some water on the card to
create some droplets. When the background is dry add a bit of wild
honey distress ink to the background and ink around the edges with
black soot distress ink.. Ink a background stamp with some picket
fence distress stain and dry with a heat gun. Next stamp a frame
image, as well as a sentiment on the background with black Versafine
ink. Stamp the butterfly with black ink on an off-cut piece of paper.
Ink the butterfly with some wild honey distress ink. Colour a few
paper roses with shabby shutters and wild honey distress stains. The
matt for the background was coloured with some black soot distress
ink , spritzed with water and dried with a heat gun. The card was
inked with some evergreen bough, and black soot distress ink. Attach
the background to the matt and sew around the edge (machine or by
hand). The film strip was attached with a tiny attacher. The staples
were coloured with some alcohol ink to match the background of the
card. Attach the roses and butterfly to the card. Use the snipped off
stems of the roses, wrap them around a paper piercer and attach two
of them behind the butterfly. Attach to the card and finish off with
some diamanté.
Card 3: Alcohol Inks
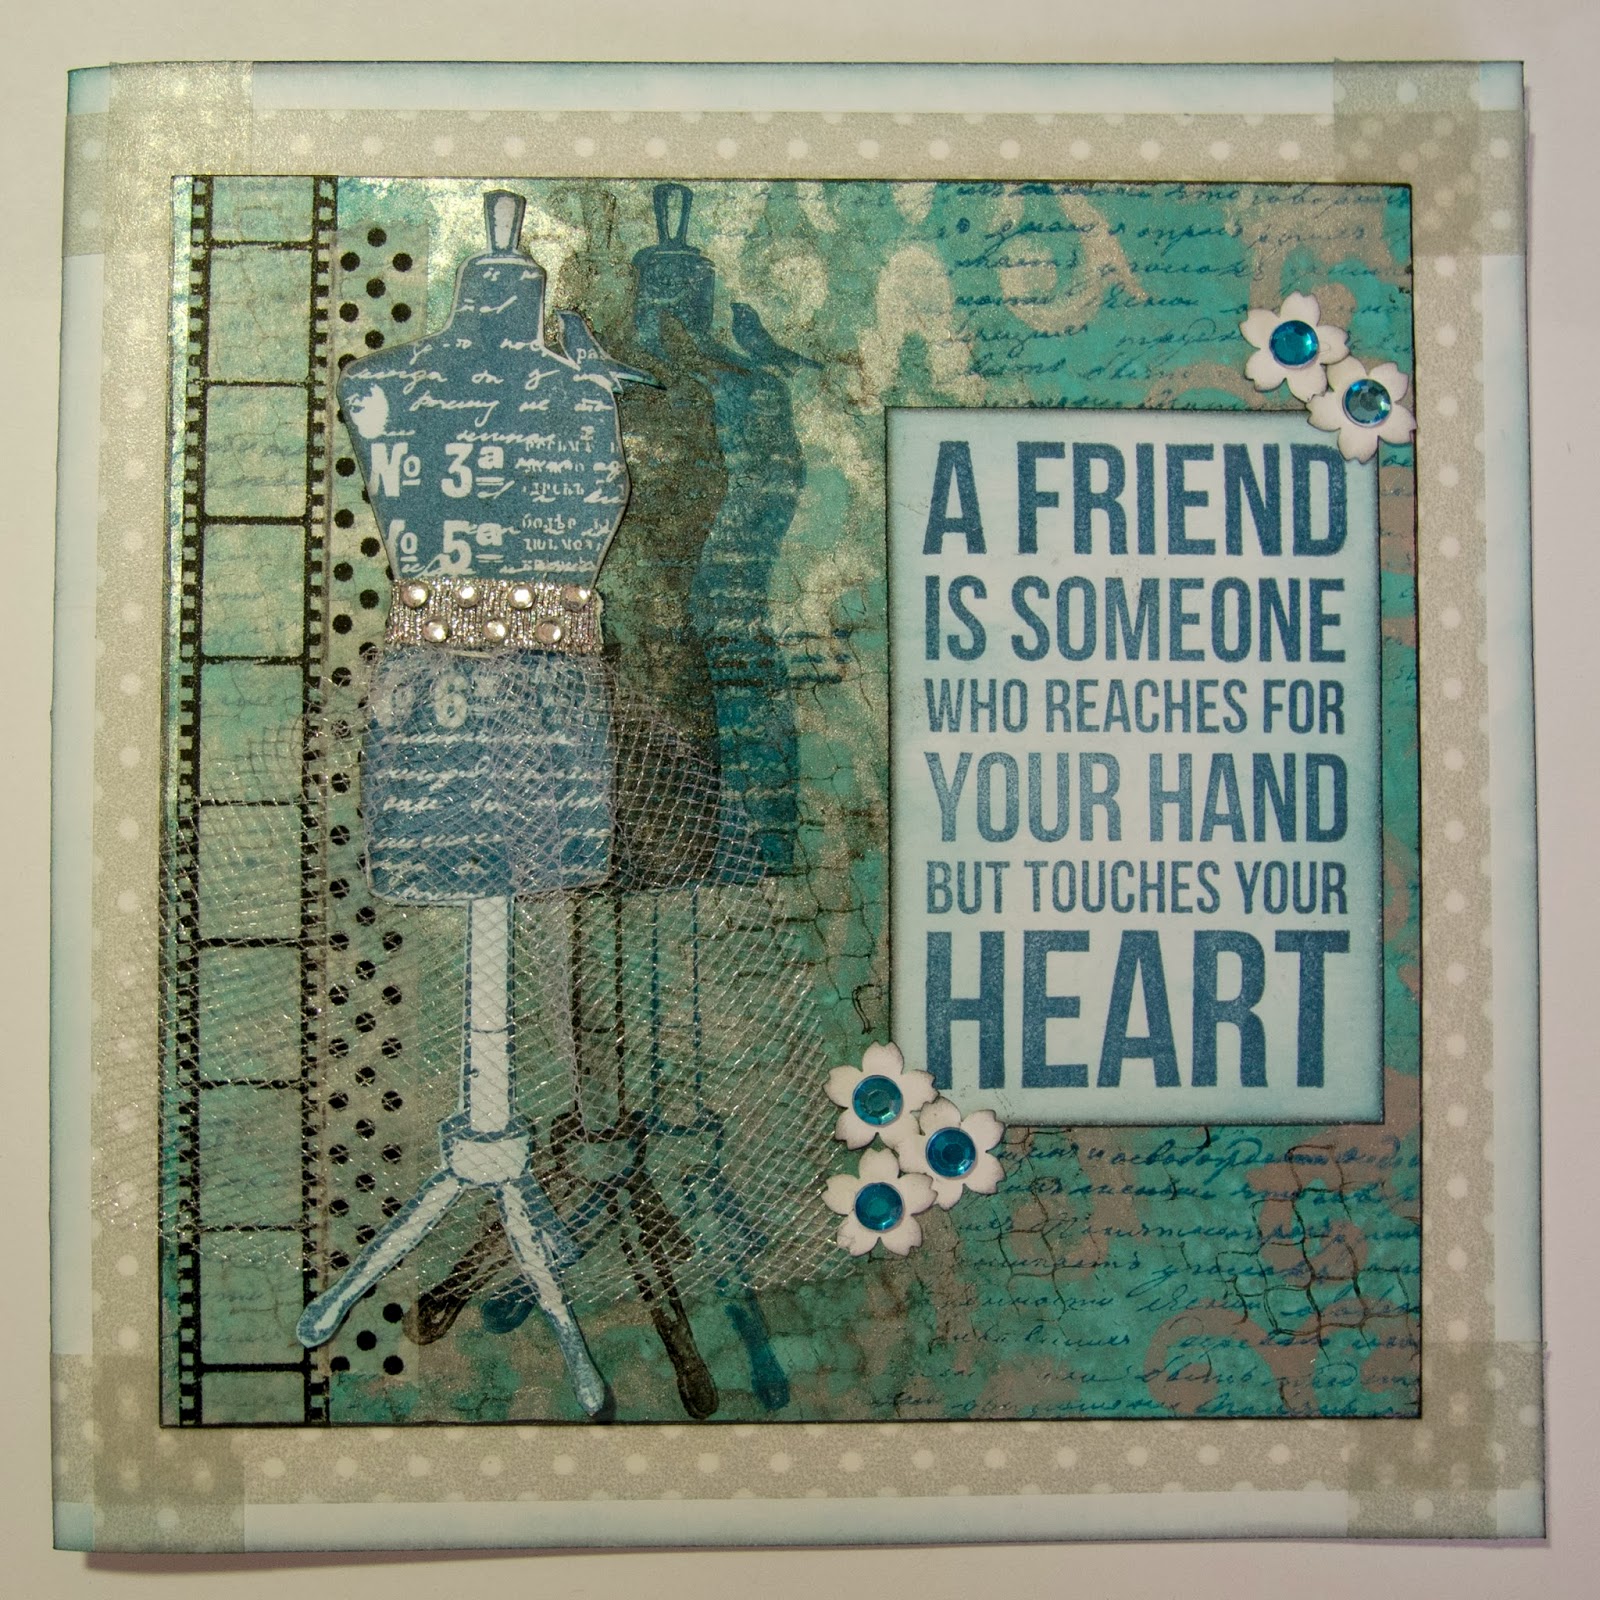
Dab the background was with some aqua alcohol ink on
a piece of glossy card stock. Put some alcohol ink silver mixative on
your craft sheet. Pick the mixative up with an ink applicator and
some blending foam and gently dab through the stencil onto the
background. Stamp some background images on the card, use first,
second and third generation (I used a script stamp with Versa Magic
Ocean Depth chalk ink, and a chicken wire stamp with some black Staz
On ink) After this is done use an ink applicator with some felt, put
some blending solution on the felt and dab around the card to sort of
blur the background. Be careful not to put to much blending solution
on the felt. You just want the edges to blur. Attach some washi tape
to the left side of the back ground. Ink the edges with some Versa
Magic Midnight Black chalk ink. With the background done use a dress
form and stamp the image twice on the background, once with black
Staz On Ink, and then with Versa Magic Ocean Depth chalk ink. Overlap
the stamped images with each other. The third dress form was stamped
on off cut white card-stock with Versa Magic Ocean Depth chalk ink,
fussy cut it and lightly ink with peacock feathers distress ink as
well as black soot around the edges. Embellish the dress form with
some netting, ribbon and diamanté, and attach to the background
overlapping the stamped dress form. The sentiment was stamped on off
cut white card-stock with some Versa Magic Ocean Depth chalk ink.
Lightly ink this with peacock feathers distress ink as well as ink
the edges with some black soot distress ink. Attach to the
background. Punch some flowers, ink the edges with some black soot
distress ink, use some diamanté as flower centres. Attach these to
the background. The card was lightly inked with peacock feathers and
some black soot distress ink around the edges. Some grey polka dot
washi tape was used as a frame before the background was attached to
the card.
Card 4: Distress Paint Dabbers

Dab some distress paints on your craft sheet. I used wild honey,
vintage photo, fired brick and some antique linen. Spritz the paints
with water and drag the card through the paints until you are happy
with the result. Spritz the card with water to make the paint react
more and then dry with a heat gun. Dab some more distress paint on
the craft sheet. With a distress ink applicator and some blending
foam pick up bits of the distress paint and dab through various
stencils onto the background. Cut half a circle from some off-cut
patterned paper, ink with some vintage photo distress ink. The matt
for the background was cut from dark brown card stock, and punched
around two sides. Little circles were punched from a “flop” and
used on the border. Attach the background to the matt. I used a
sewing machine to create the rays of the sun as well as sew around
the background and the half circle. The banner was cut from off cut
white card-stock, inked with vintage photo distress ink and the
sentiment was stamped onto it. This was attached to the card with
some 3d squares. To complete the card attach some buttons. Attach
this to a craft coloured card, which was inked with some vintage
photo distress ink.
Remember, all the supplies I have used are available at the Scrapbook Studio
Happy scrapping
Lee
No comments:
Post a Comment